大网站google框架一键安装
⼀.etcd安装
Docekr安装Etcd
环境准备
此处安装,是利⽤下载的 etcd 源⽂件,利⽤ docker build 构建完整镜像,具体操作如下:
1.环境准备
1.1. 新建⽂件夹
在磁盘某个路径下新建⼀个⽂件夹,⽤处操作 Dockerfile 和 源⽂件。
演⽰中的路径在 /data/docker-compose/etcd ,如特殊说明,否则都在此路径,以下简称
ETCD_HOME
1.2. 下载
在 ETCD_HOME 中下载最新版本,官⽅下载地址如下: wget https://github.com/etcd-io/etcd/
1.3. ⽂件解压
解压⽂件 tar.gz 得到 etcd-v3.4.20-linux-amd64 ⽂件夹。
tar -zxvf etcd-v3.4.20-linux-amd64.tar.gz
1.4. ⽂件拷⻉
在 etcd-v3.4.20-linux-amd64 ⽂件夹下,有 etcd 和 etcdctl 两个⽂件,拷⻉⾄与 etcd-v3.4.20-linuxamd64 同⼀级。
cp etcd-v3.4.20-linux-amd64/etcd etcd-v3.4.20-linux-amd64/etcdctl .

2.安装
2.1Dockerfile编写
FROM alpine:latest
ADD etcd /usr/local/bin/
ADD etcdctl /usr/local/bin/
RUN mkdir -p /var/etcd/
RUN mkdir -p /var/lib/etcd/
RUN echo 'hosts: files mdns4_minimal [NOTFOUND=return] dns mdns4' >> /etc/nsswitch.conf
EXPOSE 2379 2380
CMD ["/usr/local/bin/etcd"]
2.2构建镜像并推送
//打包为docker镜像
docker build -t 阿里云镜像仓库地址/xxxx/etcd:5.1.Z .
//将docker镜像推送到阿里云上
docker push  阿里云镜像仓库地址/xxxxx/etcd:5.1.Z
2.3启动镜像
docker run -d -v /usr/share/ca-certificates/:/etc/ssl/certs -p 4001:4001 -p 2380:2380 -p 2379:2379 \--name etcd 阿里云镜像仓库地址/xxxx/etcd:5.1.Z /usr/local/bin/etcd \-name etcd0 \-advertise-client-urls http://182.182.33.103:2379 \-listen-client-urls http://0.0.0.0:2379 \-initial-advertise-peer-urls http://0.0.0.0:2380 \-listen-peer-urls http://0.0.0.0:2380 \-initial-cluster-token etcd-cluster-1 \-initial-cluster etcd0=http://0.0.0.0:2380 \-initial-cluster-state new
name: 节点名称
advertise-client-urls: 知客户端url, 也就是服务的url 就是etcd部署在那台机器上就写那台的ip
initial-advertise-peer-urls: 告知集群其他节点url
listen-peer-urls: 监听URL,用于与其他节点通讯
initial-cluster-token: 集群的ID
initial-cluster: 集群中所有节点
3.下载并安装etcd-manager(etcd的可视化客户端)
https://etcdmanager.io/
二.安装apisix
1.首先在创建如下文件夹和文件:
文件地址:
/opt/apisix/apisix-conf/
上传config.yaml到上面的文件夹下
内容:主要修改的是etcd:host部分
#
# Licensed to the Apache Software Foundation (ASF) under one or more
# contributor license agreements.  See the NOTICE file distributed with
# this work for additional information regarding copyright ownership.
# The ASF licenses this file to You under the Apache License, Version 2.0
# (the "License"); you may not use this file except in compliance with
# the License.  You may obtain a copy of the License at
#
#     http://www.apache.org/licenses/LICENSE-2.0
#
# Unless required by applicable law or agreed to in writing, software
# distributed under the License is distributed on an "AS IS" BASIS,
# WITHOUT WARRANTIES OR CONDITIONS OF ANY KIND, either express or implied.
# See the License for the specific language governing permissions and
# limitations under the License.
#apisix:node_listen: 9080              # APISIX listening portenable_ipv6: falseenable_control: truecontrol:ip: "0.0.0.0"port: 9092deployment:admin:allow_admin:               # https://nginx.org/en/docs/http/ngx_http_access_module.html#allow- 0.0.0.0/0              # We need to restrict ip access rules for security. 0.0.0.0/0 is for test.admin_key:- name: "admin"key: edd1c9f034335f136f87ad84b625c8f1role: admin                 # admin: manage all configuration data- name: "viewer"key: 4054f7cf07e344346cd3f287985e76a2role: vieweretcd:host:                           # it's possible to define multiple etcd hosts addresses of the same etcd cluster.- "http://182.182.33.103:2379"          # multiple etcd addressprefix: "/apisix"               # apisix configurations prefixtimeout: 30                     # 30 secondsplugin_attr:prometheus:export_addr:ip: "0.0.0.0"port: 9091
/opt/apisix/dashboard_conf/
上传conf.yaml文件到上面的文件夹下
内容:主要修改etcd cluster
#
# Licensed to the Apache Software Foundation (ASF) under one or more
# contributor license agreements.  See the NOTICE file distributed with
# this work for additional information regarding copyright ownership.
# The ASF licenses this file to You under the Apache License, Version 2.0
# (the "License"); you may not use this file except in compliance with
# the License.  You may obtain a copy of the License at
#
#     http://www.apache.org/licenses/LICENSE-2.0
#
# Unless required by applicable law or agreed to in writing, software
# distributed under the License is distributed on an "AS IS" BASIS,
# WITHOUT WARRANTIES OR CONDITIONS OF ANY KIND, either express or implied.
# See the License for the specific language governing permissions and
# limitations under the License.
#conf:listen:host: 0.0.0.0     # `manager api` listening ip or host nameport: 9000          # `manager api` listening portallow_list:           # If we don't set any IP list, then any IP access is allowed by default.- 0.0.0.0/0etcd:endpoints:          # supports defining multiple etcd host addresses for an etcd cluster- "http://182.182.33.103:2379"# yamllint disable rule:comments-indentation# etcd basic auth info# username: "root"    # ignore etcd username if not enable etcd auth# password: "123456"  # ignore etcd password if not enable etcd authmtls:key_file: ""          # Path of your self-signed client side keycert_file: ""         # Path of your self-signed client side certca_file: ""           # Path of your self-signed ca cert, the CA is used to sign callers' certificates# prefix: /apisix     # apisix config's prefix in etcd, /apisix by defaultlog:error_log:level: warn       # supports levels, lower to higher: debug, info, warn, error, panic, fatalfile_path:logs/error.log  # supports relative path, absolute path, standard output# such as: logs/error.log, /tmp/logs/error.log, /dev/stdout, /dev/stderraccess_log:file_path:logs/access.log  # supports relative path, absolute path, standard output# such as: logs/access.log, /tmp/logs/access.log, /dev/stdout, /dev/stderr# log example: 2020-12-09T16:38:09.039+0800        INFO        filter/logging.go:46        /apisix/admin/routes/r1        {"status": 401, "host": "127.0.0.1:9000", "query": "asdfsafd=adf&a=a", "requestId": "3d50ecb8-758c-46d1-af5b-cd9d1c820156", "latency": 0, "remoteIP": "127.0.0.1", "method": "PUT", "errs": []}security:# access_control_allow_origin: "http://httpbin.org"# access_control_allow_credentials: true          # support using custom cors configration# access_control_allow_headers: "Authorization"# access_control-allow_methods: "*"# x_frame_options: "deny"content_security_policy: "default-src 'self'; script-src 'self' 'unsafe-eval' 'unsafe-inline'; style-src 'self' 'unsafe-inline'; frame-src *"  # You can set frame-src to provide content for your grafana panel.authentication:secret:secret              # secret for jwt token generation.# NOTE: Highly recommended to modify this value to protect `manager api`.# if it's default value, when `manager api` start, it will generate a random string to replace it.expire_time: 3600     # jwt token expire time, in secondusers:                # yamllint enable rule:comments-indentation- username: admin   # username and password for login `manager api`password: admin- username: userpassword: userplugins:                          # plugin list (sorted in alphabetical order)- api-breaker- authz-keycloak- basic-auth- batch-requests- consumer-restriction- cors# - dubbo-proxy- echo# - error-log-logger# - example-plugin- fault-injection- grpc-transcode- hmac-auth- http-logger- ip-restriction- jwt-auth- kafka-logger- key-auth- limit-conn- limit-count- limit-req# - log-rotate# - node-status- openid-connect- prometheus- proxy-cache- proxy-mirror- proxy-rewrite- redirect- referer-restriction- request-id- request-validation- response-rewrite- serverless-post-function- serverless-pre-function# - skywalking- sls-logger- syslog- tcp-logger- udp-logger- uri-blocker- wolf-rbac- zipkin- server-info- traffic-split
2.执行下载和启动docker的命令
docker run -d --name apisix -p 9080:9080 -p 9443:9443 -p 9180:9180 -v /opt/apisix/apisix-conf/config.yaml:/usr/local/apisix/conf/config.yaml:ro apache/apisix:latest
下面这是web端命令:
docker run -d --name apisix-dashboard -p 9000:9000 -v /opt/apisix/dashboard_conf/conf.yaml:/usr/local/apisix-dashboard/conf/conf.yaml apache/apisix-dashboard:3.0.0-alpine
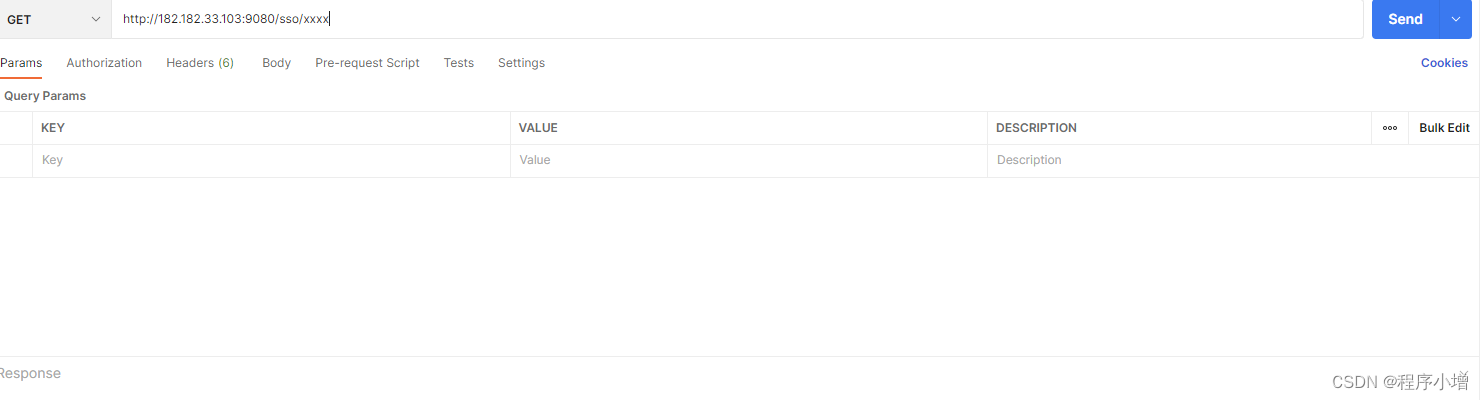
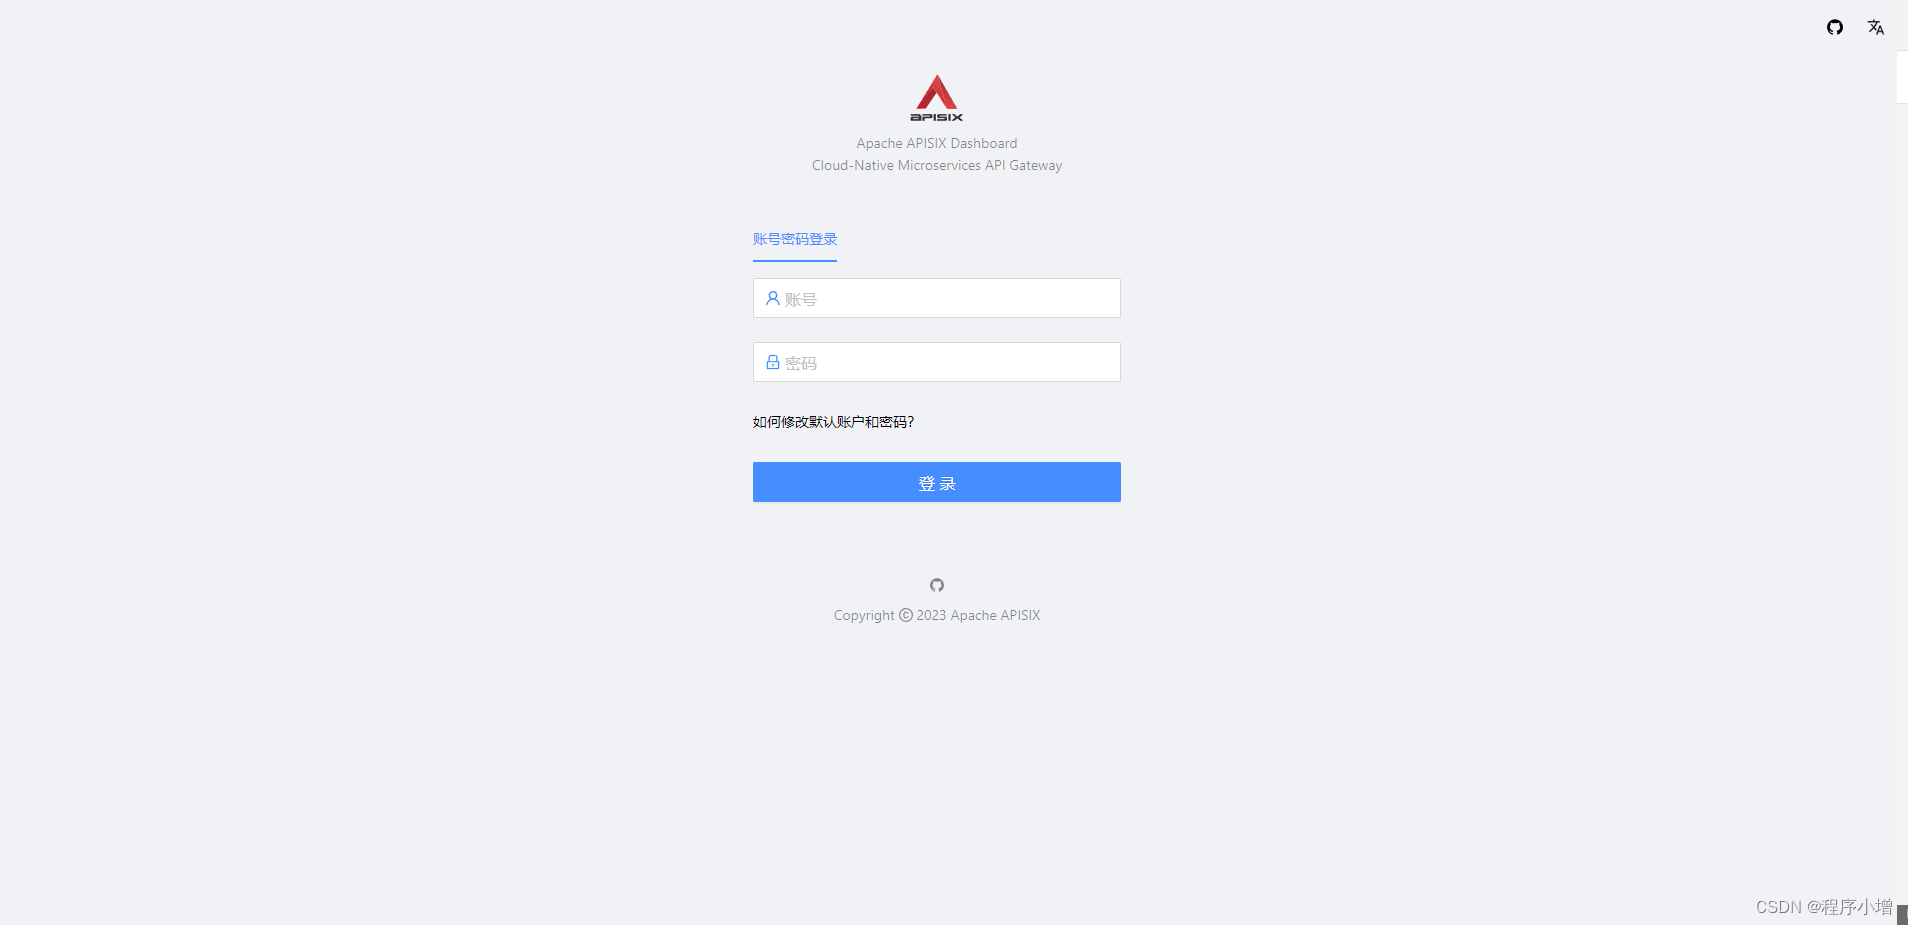
容器启动成功后访问ApiSix仪表台,如下图成功访问
3.apisix代理地址的使用
配置上游:
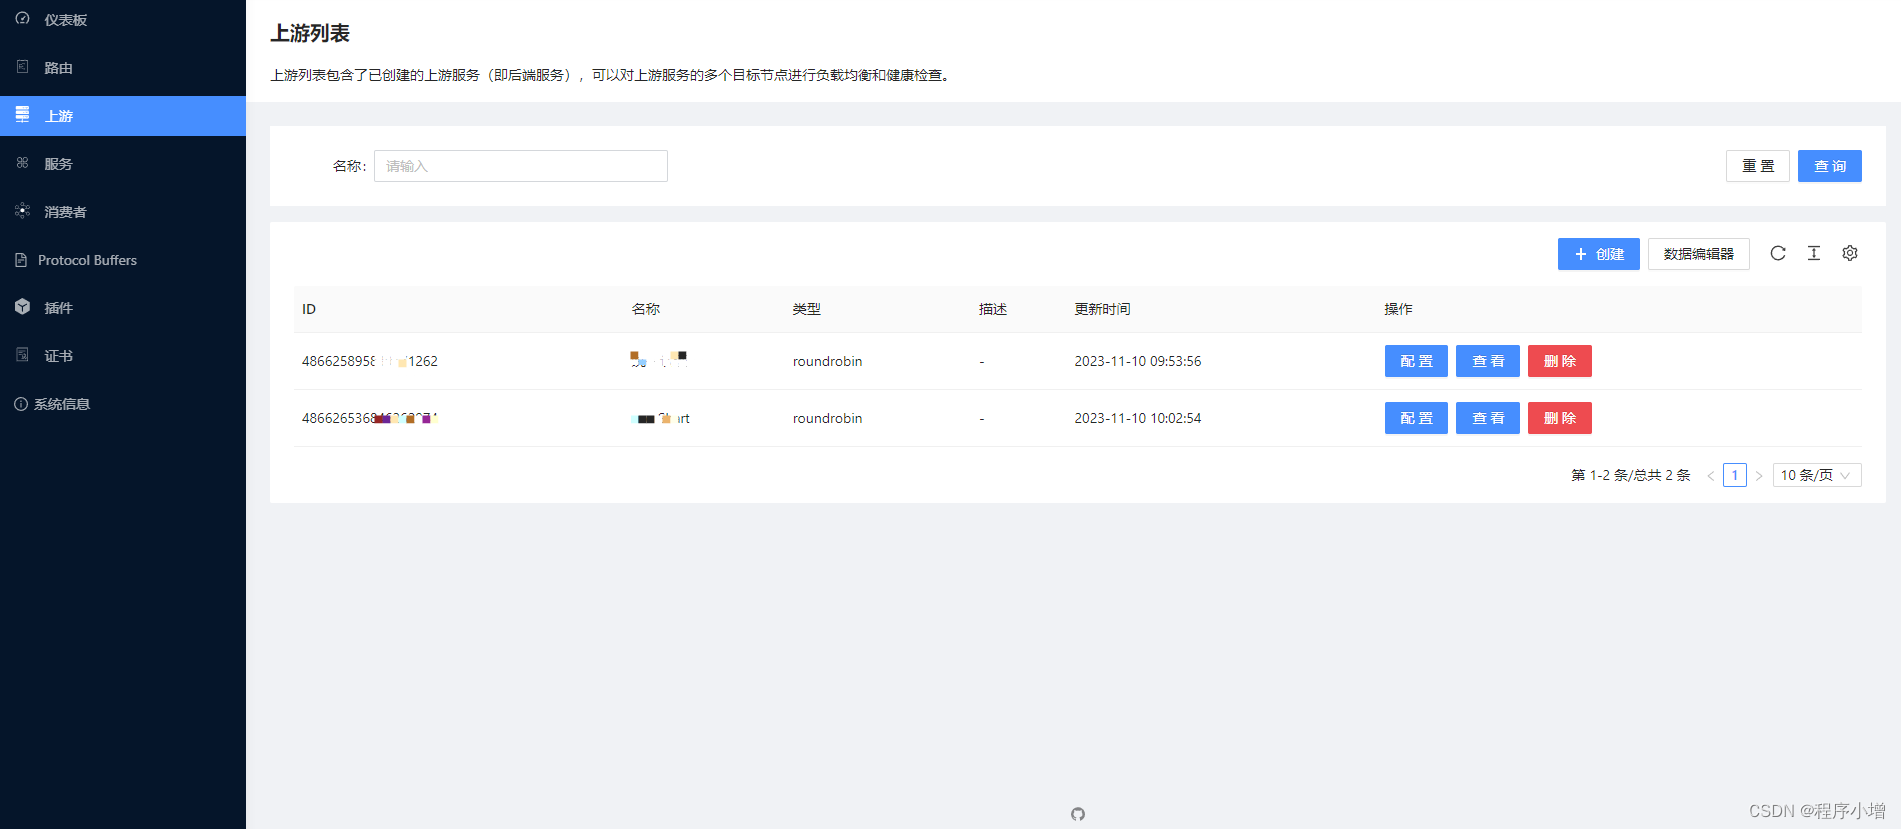
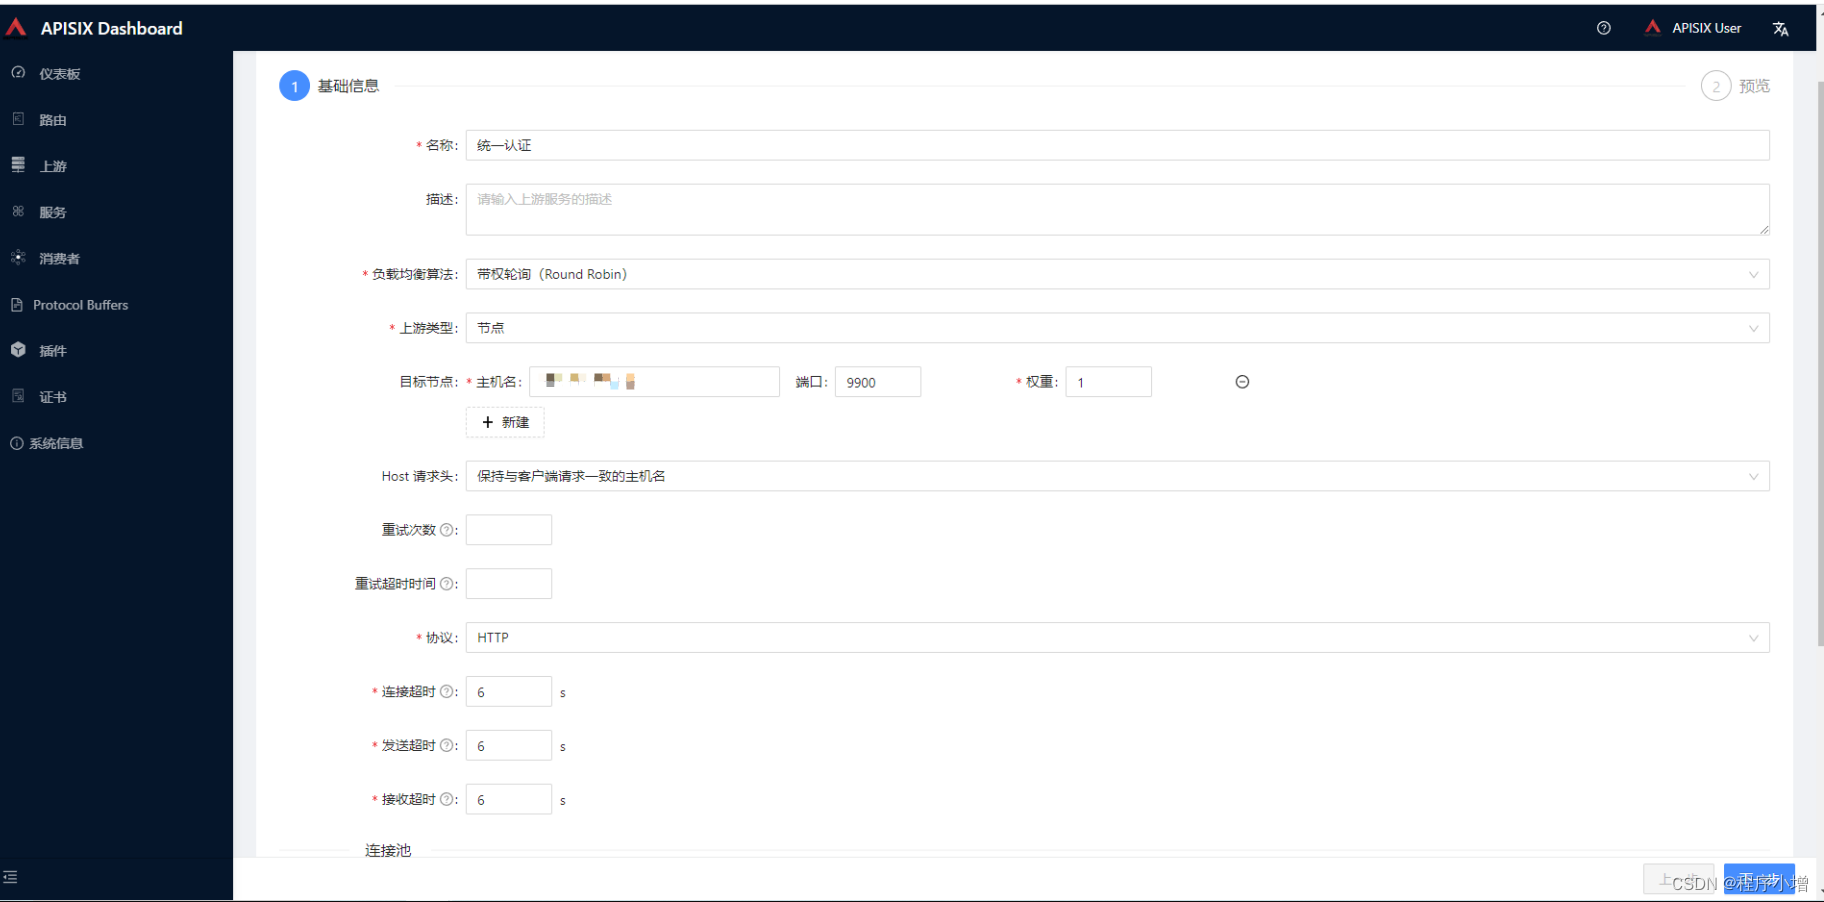
填写名称、可选择上游类型。这里选择的是节点,当然可以选择服务发现,但是需要配置。
创建完上游后可以创建路由

点击下一步选择上游服务

然后一直下一步到提交。
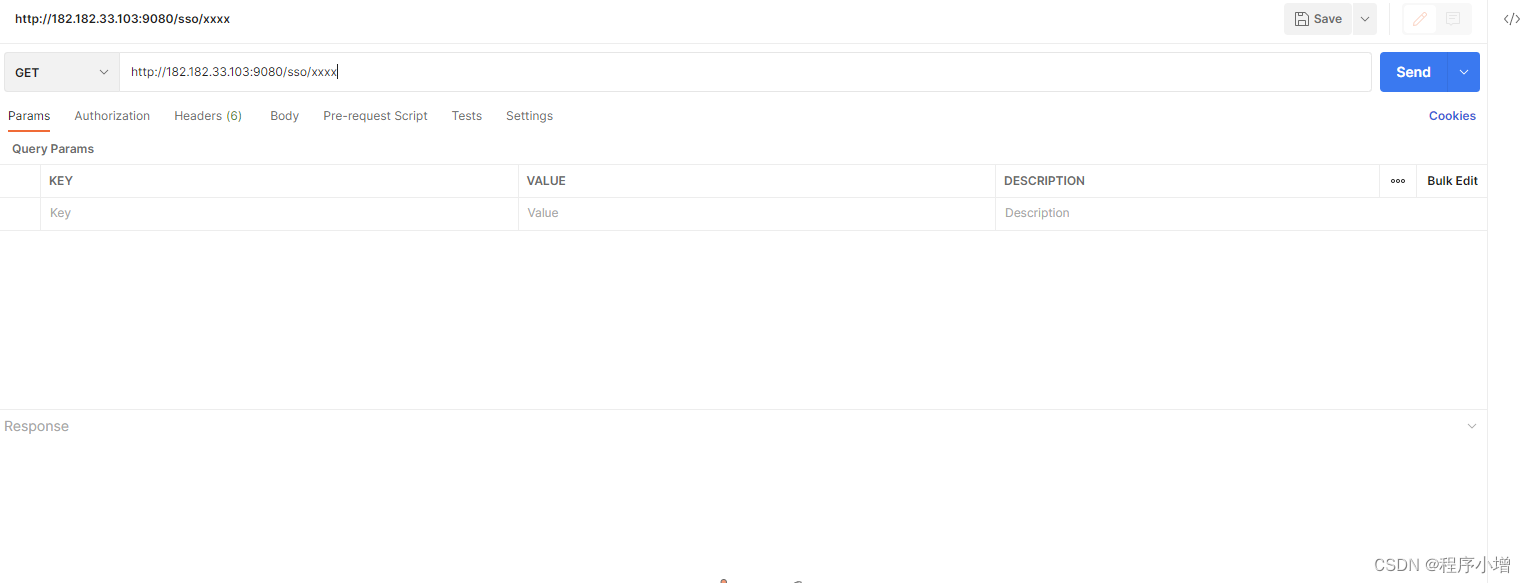
之后就可以打开postman进行测试了。
默认访问的端口是9080
apisix相关文档:
https://apisix.apache.org/zh/docs/apisix/getting-started/README/https://apisix.apache.org/zh/docs/
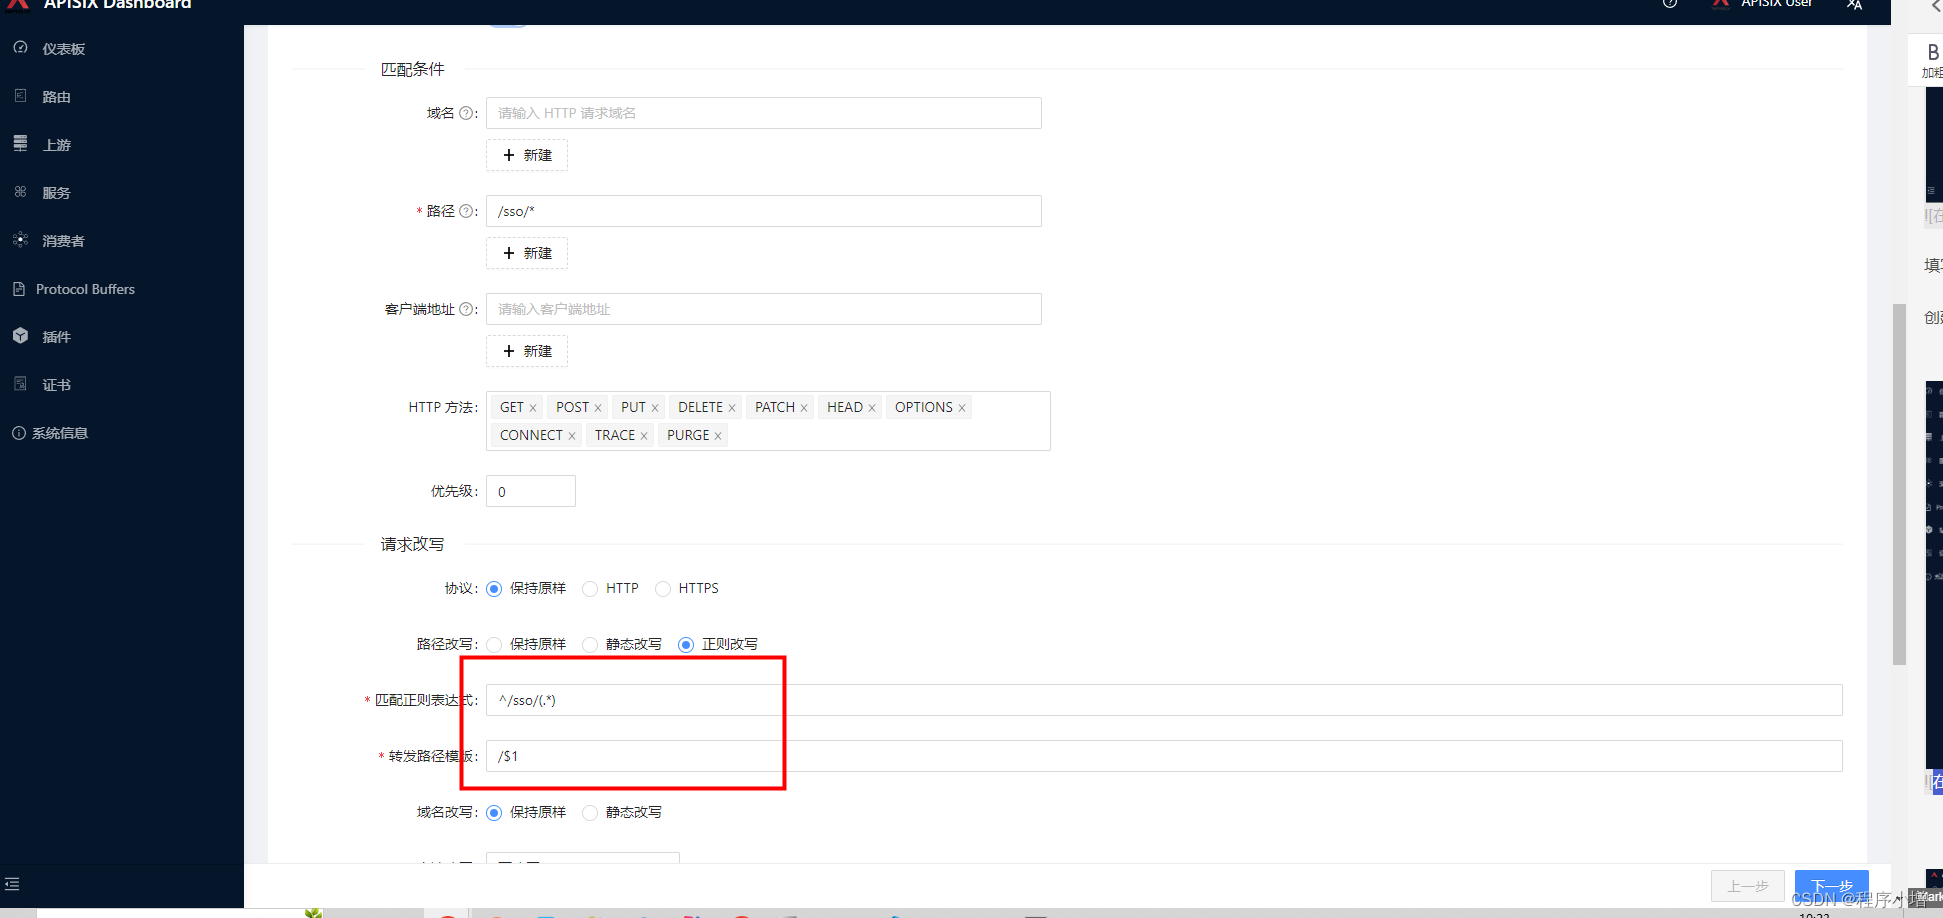
三.代理轮询的使用
1.上游类型为节点
配置上游。
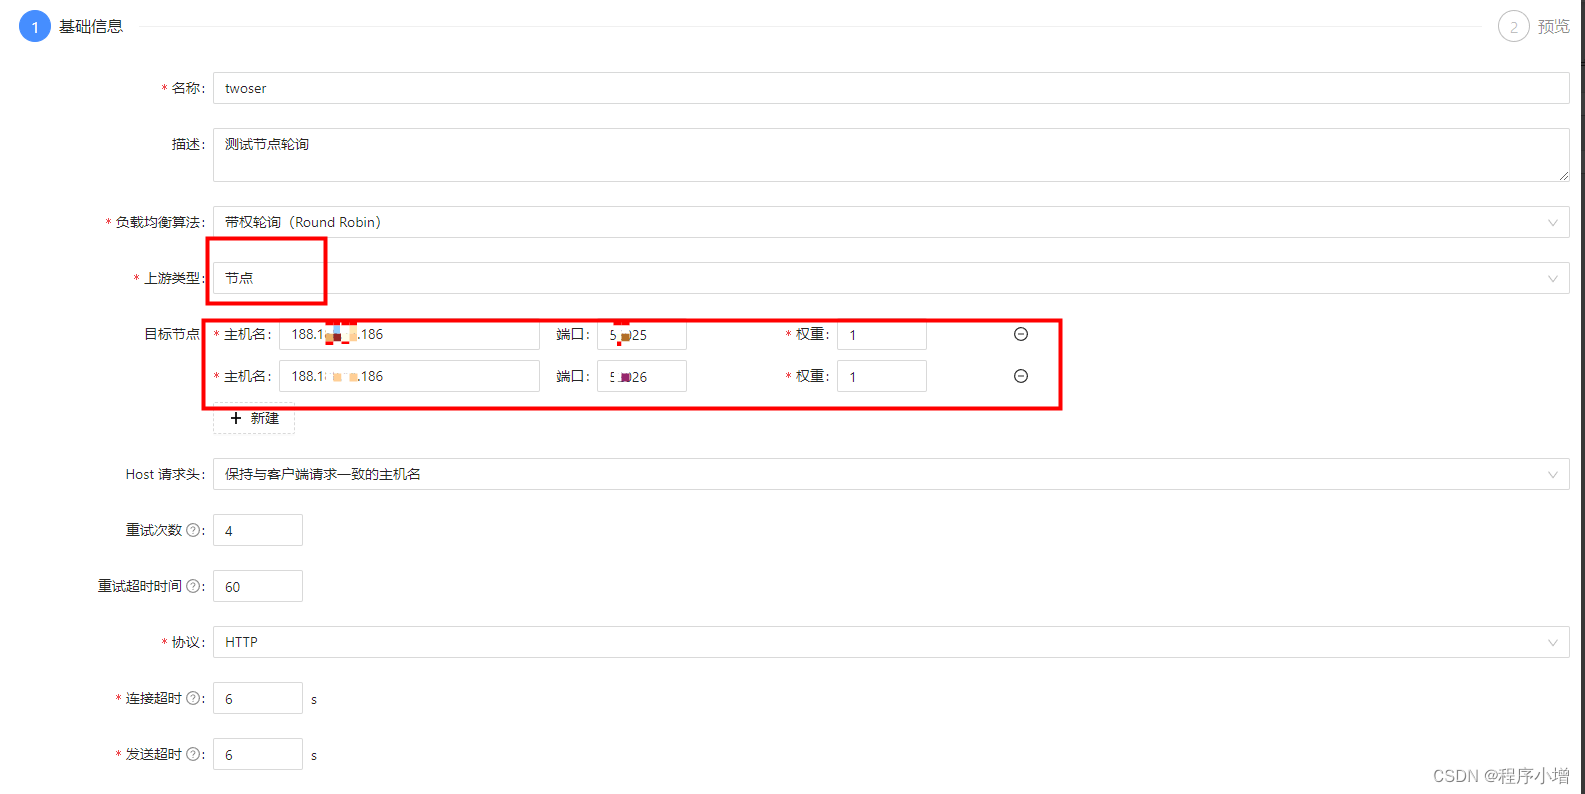
上述目标节点的配置其实是同一个后端服务的,只不过我在一台机器上无法使用相同的端口所以修改了一下端口,这个的含义就是我的一个后端服务做了集群部署,这样配置就可以轮询去访问多台服务器上的同一个后端服务。
上游配置完可以配置服务也可以直接配置路由,当配置服务后再配置路由绑定服务选择自己创建的服务。
2.服务发现的形式(这里以nacos注册中心为例)
服务发现的文章可以看看这篇:https://www.aneasystone.com/archives/2023/03/apisix-service-discovery.html
在/opt/apisix/apisix-conf/
的config.yaml文件中添加nacos配置
整体配置:
nacos:host:- "http://nacos:nacos@193.193.173.721:8848"prefix: "/nacos/v1/"fetch_interval: 30 # default 30 secweight: 100 # default 100timeout:connect: 2000 # default 2000 mssend: 2000 # default 2000 msread: 5000 # default 5000 ms
简洁配置:
discovery:nacos:host:- "http://193.193.173.721:8848"
官网文档地址:https://apisix.apache.org/zh/docs/apisix/discovery/nacos/
配置完成后重启apisix服务
配置上游

上游配置完可以配置服务也可以直接配置路由。
nacos截图
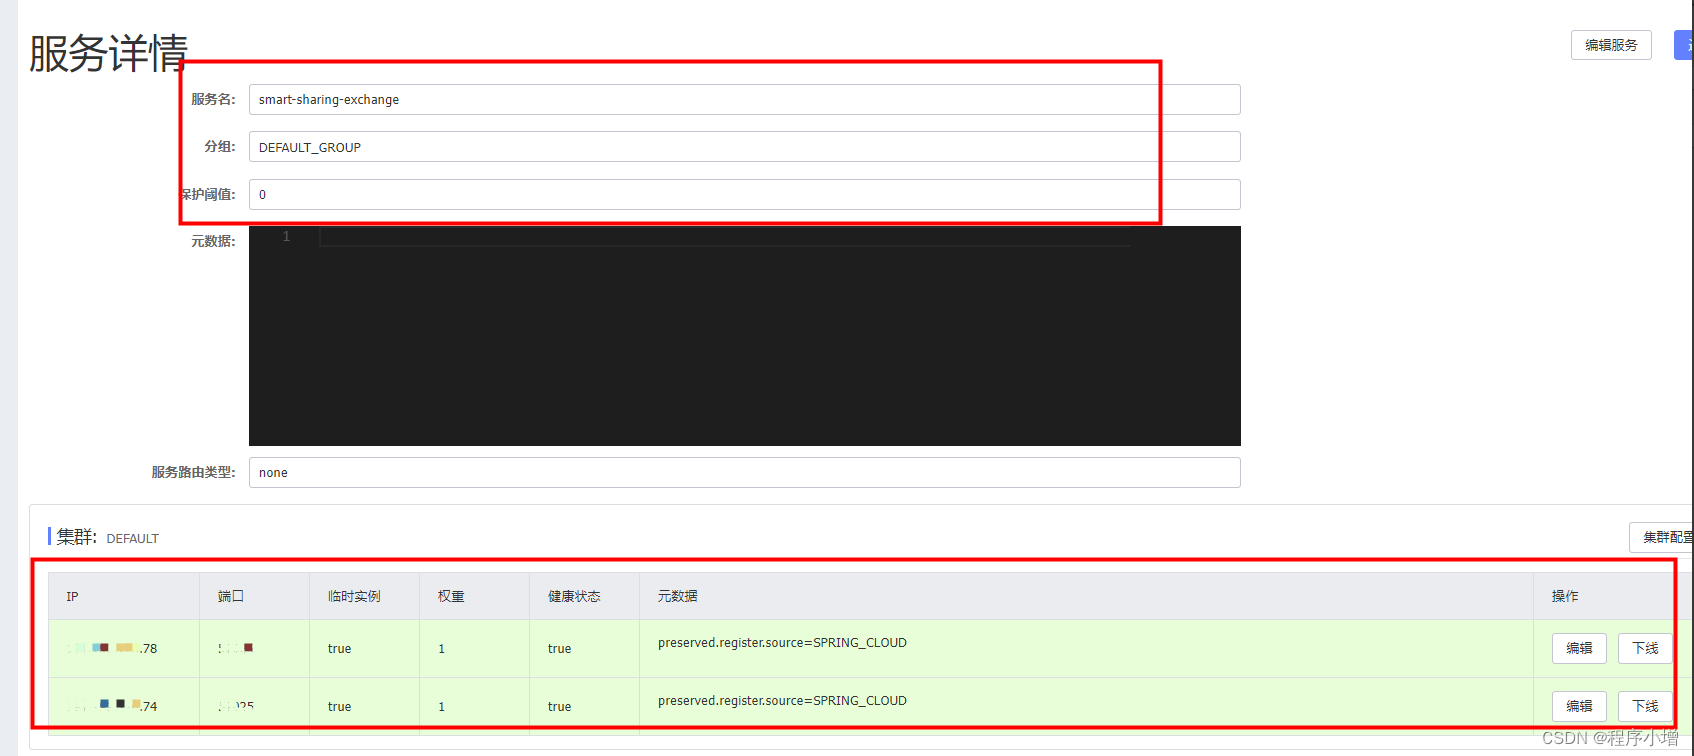
分别访问不同服务器上的同一个服务,发现可以做到轮询访问。